
The Minolta 50mm f/1.4 really is quite "nifty".
I really started getting back into photography 8 years ago when I met my good friend Turner, who produced HeyDontShoot.com with me. Today I returned to the site of our very first video https://www.youtube.com/watch?v=C0eXq9NjgAA and coincidentally shot with the exact same focal length, the "nifty fifty", 50mm prime lens.
Admittedly, that was not a great video. As a matter of fact, we had to go back and reshoot the introduction and the entire video was so shaky, that I had to begrudgingly use the YouTube "make your video less shaky" feature. Ugh. I cringe at the thought of it. We were all pretty much amateurs at that point. I mean, we barely even mentioned the fact that half of us were shooting a 50mm lens on a crop sensor camera, which is a big thing to neglect to mention since the focal length on a crop sensor camera for a 50mm lens is 75mm! That would be kind of important to know, don't you think?
But I digress.
Today I was right back there, in Uijongbu, shooting with a 50mm lens on a full-frame Sony A99. I believe that after years of practice, my shots with a 50mm have improved since those humble beginnings.

I actually don't think the 50mm is the best lens for street photography. No doubt it's a versatile focal length, but for my style of composition and what I personally like to capture, I would prefer a slightly wider field of view. I have been looking real hard at the Rokinon 45mm f/1.8 but that would be for my E Mount camera bodies, which, I have left at home for safe keeping, while I am here in Korea. That's not to say I didn't bring any wider lenses with me, I did, but someone on YouTube asked me to do a video about what settings I use for street photography on the 50mm, so, over the past few days, I took the short train ride down a few stops to Uijongbu, South Korea and only brought my 50mm.

Above image: f/5.6 ISO 800 Exp. 1/160th
Below image: f/9 ISO 800 Exp. 1/200th

In regards to my settings for the two images above: The day was overcast and rainy, with no chance of any sunshine for the entire day. ISO 800 is a good starting point for outdoor photography with moderately dark, cloudy skies. I would have had no problem going up to ISO 1250 or even 1600 but once I saw that I was able to use shutter speeds faster than 160th and smaller apertures as in the above pictures, I was perfectly happy staying at ISO 800. Why is that important? Because remember that your images will generally be more "grainy" the higher you bump up the ISO. For this Sony A99, I have noticed that the maximum ISO I ever want to use is 6400, but that's only in a real pinch. At 6400 there's noticeable grain and noise. 3200 is ok, but not great, anything 1600 and below is fine. Unfortunately, due to the rain, I wasn't really able to shoot any other photos worth sharing but at least with these two images, we can talk about settings in those conditions.

F/5.6 ISO 100 Exp. 1/250th
For the composition of the photo shown above, I wanted to focus on the art work nearest my position but also wanted to show the other art work on the support beams in the background. I selected f/5.6 because I wanted those faces in the background to be slightly out of focus (so as to keep the viewers attention on the face in the foreground) but not so out of focus that you wouldn't be able to tell what they were. Shutter speed wasn't much of a consideration since the objects are not moving and 1/250th is fast enough to avoid any hand held camera shake. Usually 1/160th is about as slow as I am comfortable with shooting hand held. Maybe in a pinch I can hold the camera steady at 1/60th, and for sure 1/30th is really pushing it, for me. Now that might change with my E mount camera bodies with in-body stabilization, but with this A99 featuring what's called sensor shift stabilization and not the 5 axis stabilization AND the Minolta lens not having stabilization, I try to keep the shutter speed at 1/160th or faster when shooting hand held. Here's a page with a little more info about image stabilization.
f/8 ISO 100 Exp. 1/400th
f/8 still gives enough out of focus blue to the background to keep the attention on the jacket in the foreground. Composed using the rule of thirds. 1/400th was the correct shutter speed in bright day light.
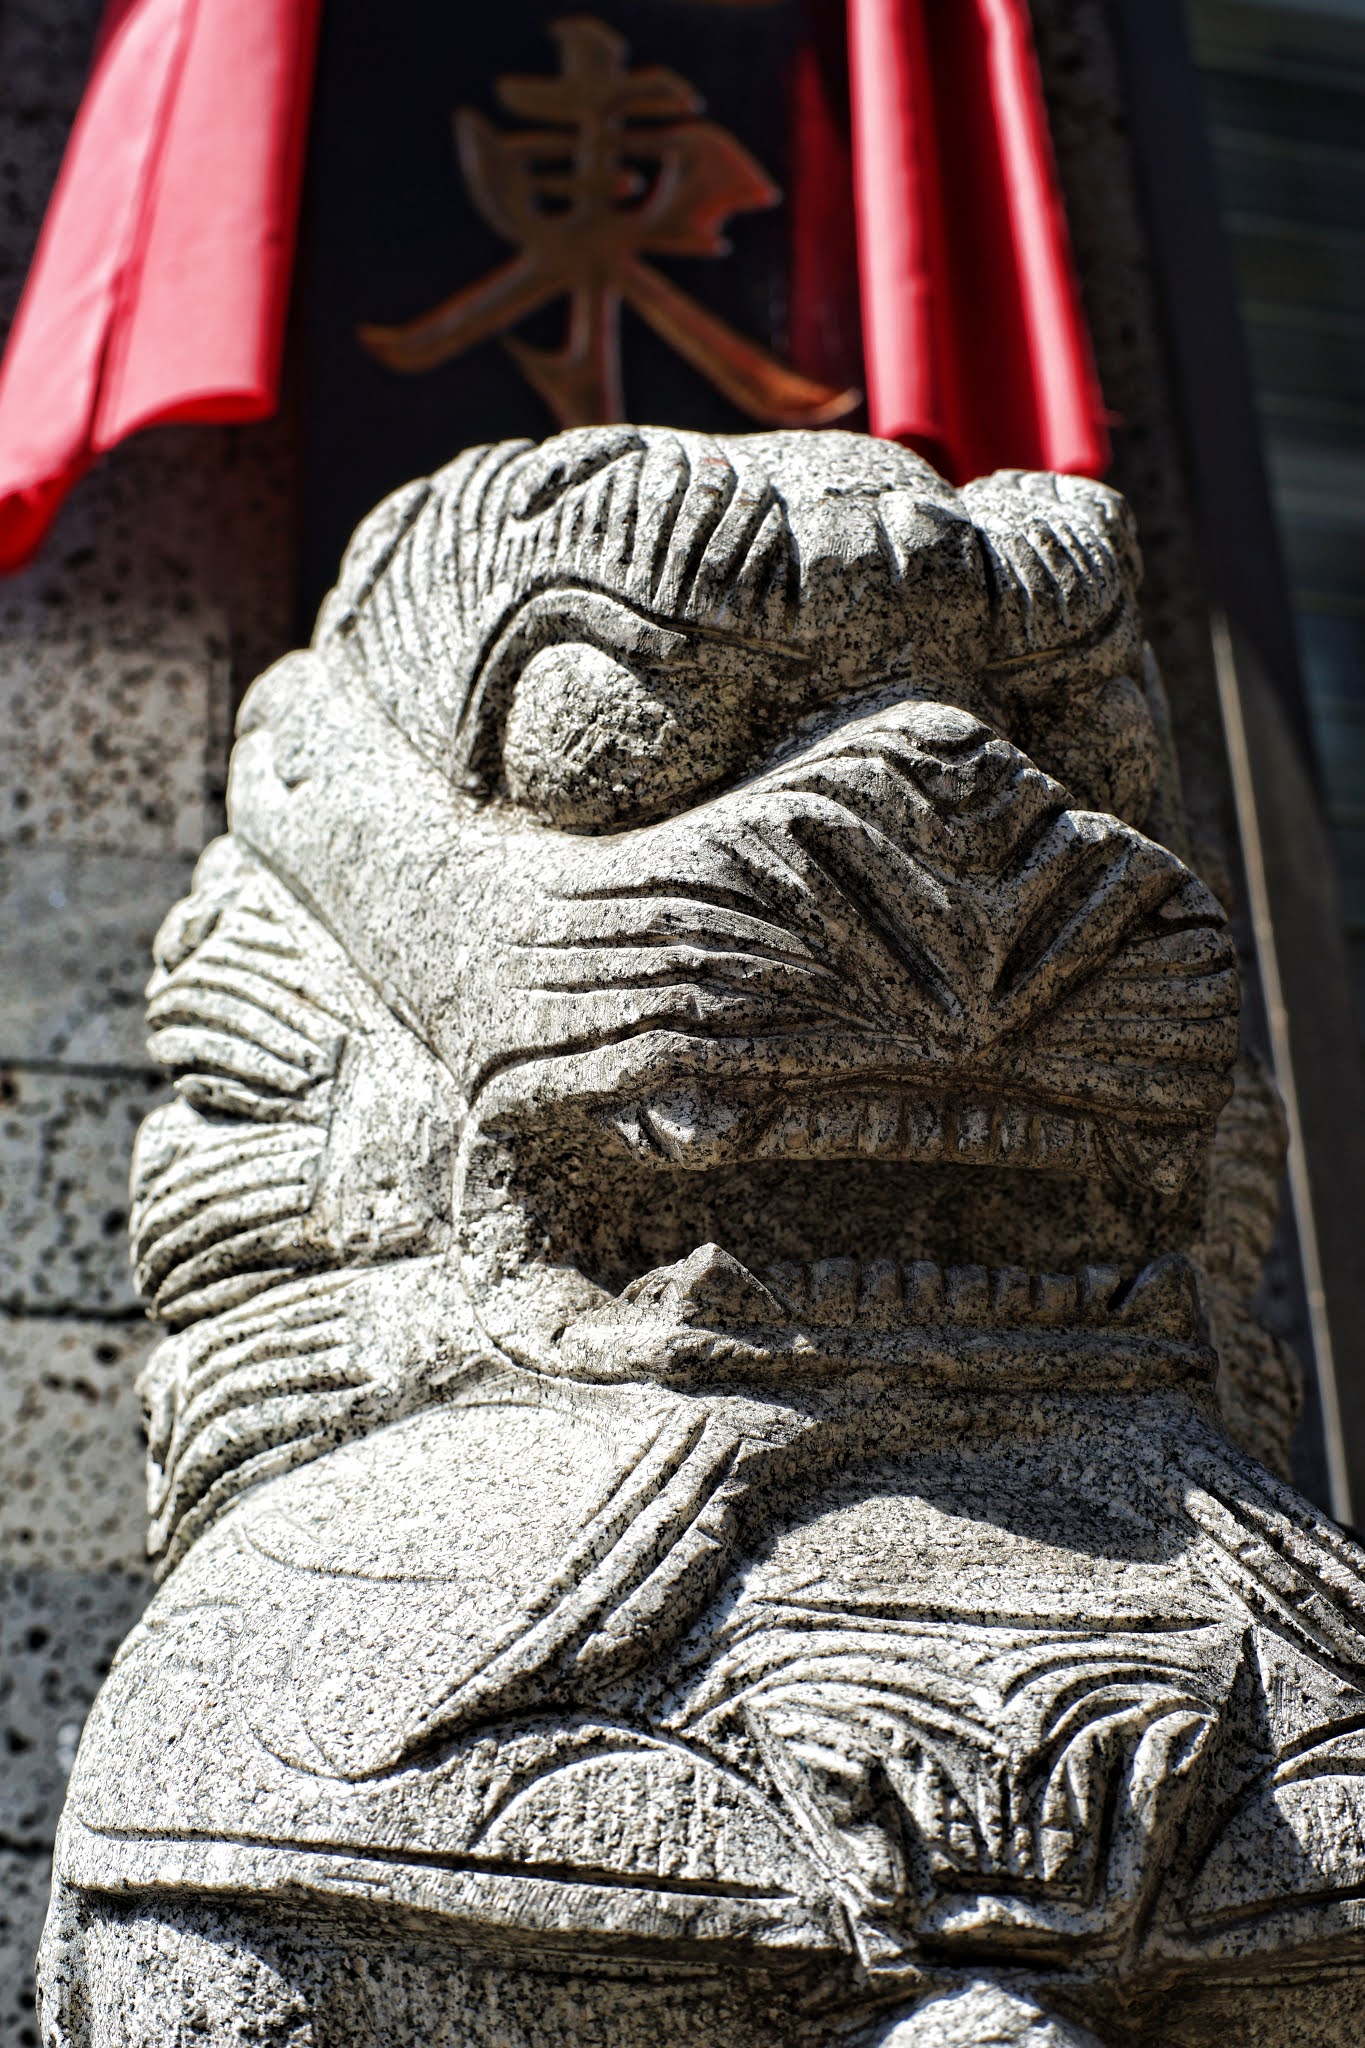
f/8 ISO 100 Exp. 1/160th
This statue was in partial shade so I drop the shutter speed down to 1/160th otherwise half his face would have been too dark and I also wanted to show the red drapes in the background.

f/11 ISO 400 Exp. 1/60th
I took a chance shooting at 1/60th but these two gals smoking cigarettes were in a really shady area. I wanted to shoot at f/11 because I wanted to keep most everything in focus and there wasn't really a background to consider even any bokeh. Dropping to ISO 400 in the shade allowed me to go with an aperture of f/11 and it appears I was able to hold the camera steady enough to avoid any motion blur from shooting hand held.
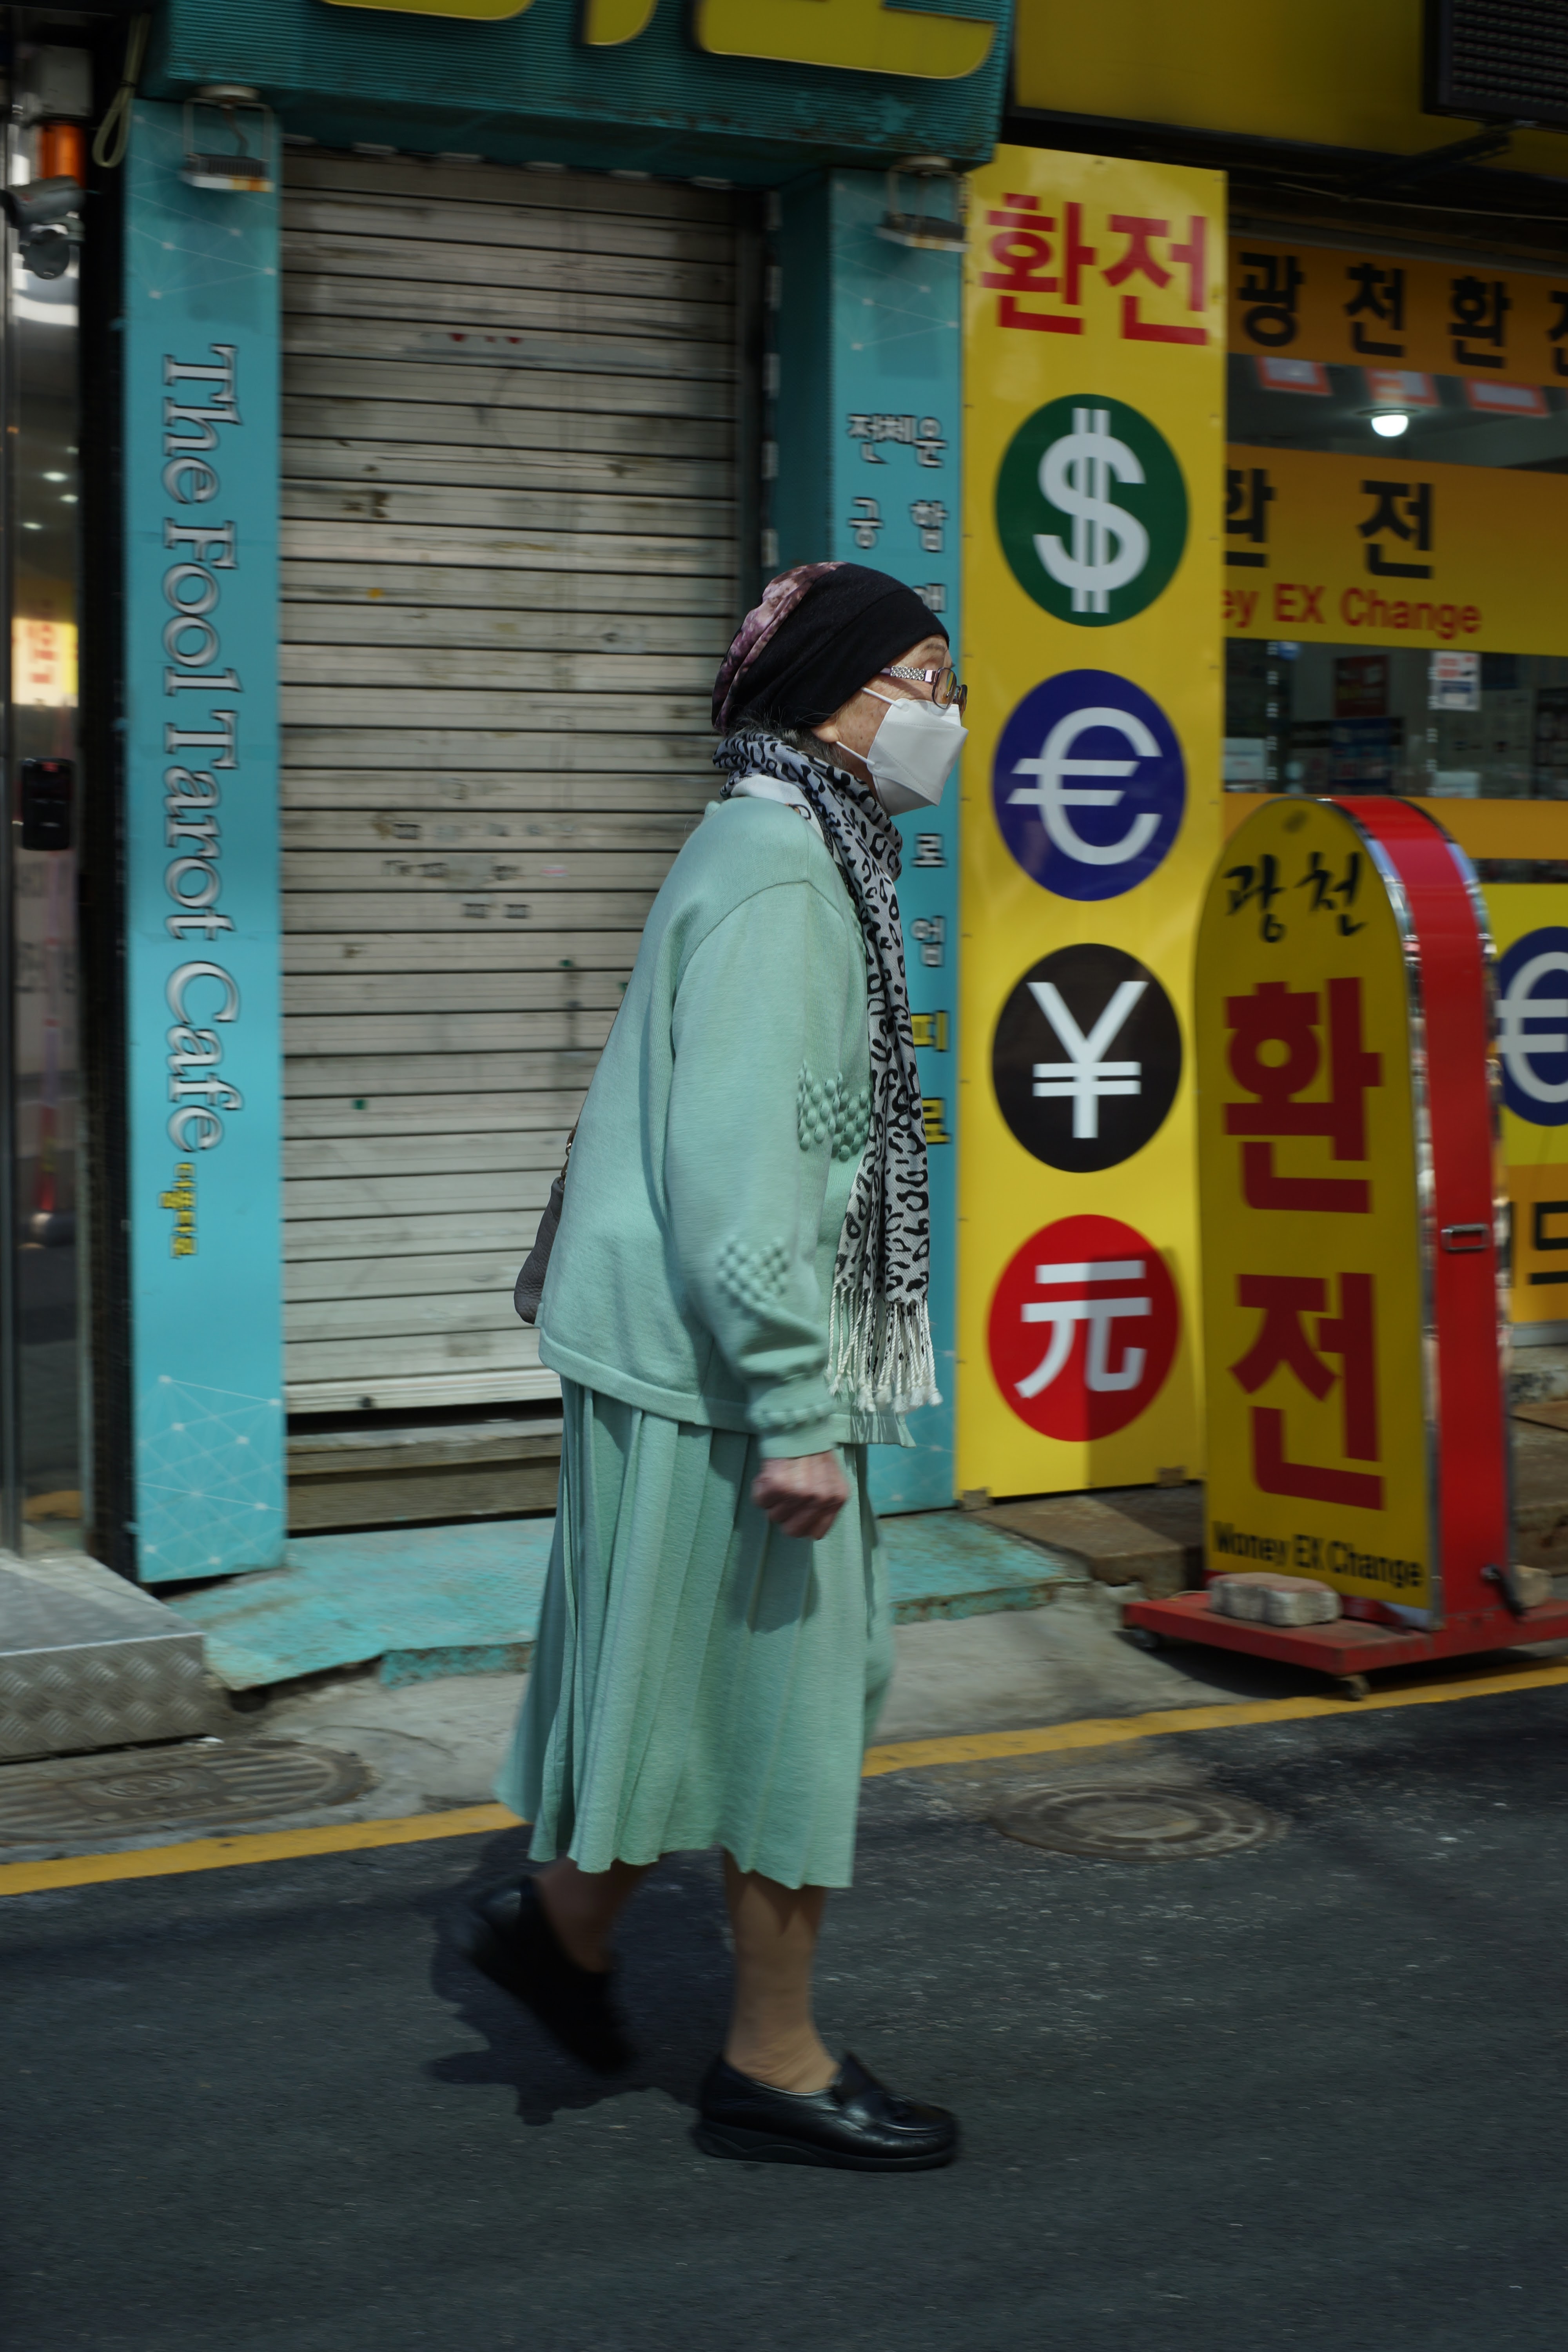
I was trying to catch this lady in the sunlight and capture the image with a tracking shot. So I kept the shutter speed at 1/60th so that the viewer would get the feeling of the woman being in motion. I think it worked pretty well because, for example, her ankles and shoes are slightly blurry, thus giving the image the feeling of motion. ISO 100 f/11.

f/4 ISO 500 Exp. 1/60th
Indoors, only artificial light, it was pretty much dim, as you can see, I had to open up the aperture and drop the ISO to 500. I could have gone to 800 or 1600 but I wanted the viewer to get a sense of what the lighting is actually like in that market.

f/4 ISO 100 Exp. 1/80th
The fresh fish booth this lady was browsing was extremely well lit with bright, white lights, allowing me to shoot at ISO 100 and 1/80th was fast enough to avoid camera shake.

This guy, slumped over from what was probably a very hard days work, wasn't going to be moving an inch so I I went f/4 ISO 500 (He wasn't as close to the light source as the lady in the above image) Exp. 1/60th.

f/4 ISO 500 1/60th

f/4 ISO 100 Exp. 1/500th
On the image above, I probably should have gone with f/8 but the guy was in the shade and I didn't want to underexpose, plus I wasn't sure how long he was going to stay in the window, so I just fired away at f/4 and well, it's kind of an OK shot.

At first I was worried the above image was going to be over-exposed but it's just barely hanging in there with a decent exposure. Actually, I think I nailed this one - f/7.1 ISO 100 Exp. 1/125th

We managed to get onto a roof top for some fun shots. Above: f/11 ISO 100 Exp. 1/160th
The Uijongbu skyline shown below: f/11 ISO 100 Exp. 1/200th


Went for a little tracking with motion blur on the yellow bus. I had to go all the way to f/22 so that I could snap at 1/30th of a second. The ISO is 100. So for those of you wanting to try your hand and tracking, slow your shutter speed down and follow your subject, then SNAP!

Above: f/11 ISO 100 Exp. 1/60th. I was also tracking her but didn't want too much motion blur.
Below: f/11 ISO 100 Exp. 1/320th. Infrared effect via Topaz Labs Black and White Effects.


Above, alley in the shade. f/8 ISO 320 Exp. 1/60th
Below: Monument to the ROK - US Alliance at the Uijongbu Freedom Park outside Uijongbu Station.
High contrast mono. f/11 ISO 100 Exp. 1/500th


And finally some nice potted succulents in the shade. f/8 to keep most of the plants in the foreground in focus. ISO 100 and Exp. 1/80th
Below: Paul the Tailor. Shot indoors, f/4 ISO 400 Exp. 1/60th

The 50mm is a wonderful lens and as you can see by the variety of shots I shared, it's quite versatile. Remember that in the shade or on a cloudy day with no sunshine peeking through, you'll probably want to go with ISO 800, maybe you can get away with 400, it depends on your lens and how wide you can open the aperture, or maybe better said, how wide YOU WANT to open the aperture, right? You have to consider exactly how much depth of field you want in your composition and then that will determine what range of shutter speeds you can use.
Good street photography boils down to being ready at the right moment, so don't turn your camera off, heck, don't even let it go into sleep mode. Compose the shot so that it's pleasing to the eye and catches the viewers attention and lastly, look for irony, colors, whimsical situations, distinguished faces and anything that stands out to you. Happy shootings!
No comments:
Post a Comment